Showing posts with label Ink Pads. Show all posts

Saturday, January 12, 2013

Stampin Up Stash for SALE


My stash is now available to be YOUR STASH.
With great regret I will no longer remain active with 
Its time to clean the clutter and its all gotta go. 
Please help me get rid of all this
**I will update my available list daily**
Orders/Requests will be honored first come first serve.
Please email me your requests
SEE SOME PHOTOS HERE

I accept Paypal only please - send me your list of wishes and your zip code for accurate shipping costs. I will do my best to use flat rate shipping 

help save, I use USPS and will insure and send tracking. These costs will be reflected in your shipping quote. Items will be coming from a 

non-smoking, pet free home in Southern California.


If you have any questions about any of the items 
please feel free to email me directly at Kreativeatheart@gmail.com. 
There is a hold period of items for 48 hours, if payment is not received within this time period the item will be listed for sale again.

Thank you

Nikki Sapien
Kreative at Heart


Wood Sets:
Dasher (EUC) - 10

Baroque Motifs (NEW unmounted) - $15
Starring You used  -5

Acryllic Stamps:

Fresh vintage(sale-a-bration) EUC -12
Papaya Collage GOOD CONDITION -12
Lacy & Lovely NEW UNOPENED -15
Four Seasons NEW UNOPENED(Hostess Exclusive) -15
Wicked Cool NEW  UNOPENED-10
Jack of All Trades NEW UNOPENED-10
  
Tools: 
Natural Cotton Ribbon 7/8" -$5 NEW UNOPENED
NEW Des. Fabrick Deck the Halls 3 fat qtrs of 18”x28”  -5 NEW UNOPENED
Patterns Pack III (DSP) NEW $5
Alhambra Wheel; fits reg. size (NEW/UNUSED) $6
Merry Christmas Wheel (reg)$3 NEW/UNUSED

Non-Stampin Up Items:

Martha Stewart Butterfly Builder handle Punch  -10
Sizzix Medium Mackenzie w/Latte Die  -5
Sizzix HELLO KITTY DIE -15
quick kutz star die NEW -2  (can be used in Sizzix machine)
qick kutz star cookie cutter die NEW -2 (can be used in Sizzix machine)
quik kuts circles 2 dies-NEW -2  (can be used in Sizzix machine)
quik kutz birds 1 die-NEW -5  (can be used in Sizzix machine)
Sizzix mackenzie's cat latte-NEW  -5


Friday, July 20, 2012

TGIF-YOUR INVITED!!

So you have all seen my semi-intro to Scrapbooking. 
And Tonight Im holding a 
Scrapbook class at my home. 
I know due to distance or work schedules 
there are some people who are 
interested in Stampin Up products but 
cant always attend 
a class at my home...
SO.... THIS WEEK ONLY*** 7/20 - 7/27 
I'm keeping my Party OPEN to 
Online Purchases!!! 
This party is OPEN TO ANYONE who would like to join. 

Please take a look at the catalogs I 
have posted online - 
You are going to be amazed at what we carry!! 
There's definitely something for 
EVERYONE!! 
Ribbons for bow makers, fabrics 
and cutters for sewers, etc...


Heres the BONUS: I will be entering 
EVERYONE who makes a purchase from me of $25 
or more into a raffle for a FREE GIFT from me!
~I will select 3 people who purchase $25 or more to receive this offer~
OR
If you spend $65 or more, you can not only take advantage 
of this months offer HERE
but ALSO receive a FREE INK PAD of your choice 
FOR FREE!!! (I will select 3 people who purchase $65
or more to receive this offer)
** Prizes MUST be redeemed before July 30th**

So not only are you able to participate in 
THIS MONTHS PARTY
from where you are... but ALSO get the chance
to win FREE stuff!!!

NOTE: To place an order PLEASE EMAIL ME 
your order so that I can honor your gift redemption ~NikkiSapien@gmail.com~


You can find catalogs online, here: 

Annual Catalog: CLICK HERE

Espanol Catalog: CLICK HERE

Thank you sooo Much! And I would LOVE it if you could "invite" 
your friends and family to this event as well 

Monday, July 16, 2012

My Monday's a bit Sketchy....

Hiddee Hooo Kreative Krew!!! 

Happy Monday.... 
If you are a daily follower you know that I try to at least 
post once a day on my Blog. And well....My Mondays and Fridays
 are kind of a bit what you would say "under construction".... 
But I think I found a solution to my Kreative Block! 

There are like a Million Guzillion Trillion 
blogs out there for "sketch this", "sketch that", "sketch challenge here"
"scratch that challenge" there & "pick a color challenge instead" ...

These challenges are all over the internet for every day of the week 
and by the time I can even see straight I've already missed out on it
(maybe you would say...that's MY challenge!)

Its enough to swirl you into next TUESDAYS challenge...
{hahahahah}

Anyway, I just seek a challenge to break me OUT of my Kreative Block at times and help me discover new layouts I would have not thought of
or color ensembles that I would have NEVER put together.

So among all these blog challenges I'm introducing my own twist
~My Sketchy Monday~

Looking over these sites and possible layouts I want to embark on new 
personal challenges and they might spark interest of yours too. 
Maybe you hit that "block" occasionally and could use a little help. 


 Here is today's Sketch It Challenge.  
Found Here
I created this card using a 6x6 card layout and built from there. 
Not too bad, but here was a challenge I felt would help me break out of my 
anti-layering funk. The card was fun
but I can Definitely see this best as a Scrapbook Layout
***What do you think?***

Rules To Join Along:
Anyone can join!! Customers, New Friends and/or Fellow Demos
Challenges Must be done using SU Product Only (Retired or Current)
Please Link back to MY Blog from your Blog Post
Please leave your Blog address below in the comment field so we call all view 
your layout leave you a comment.... and most IMPORTANTLY
Have FUN!

And if there is a Sketch blog you would like me to consider
please send me an email (NikkiSapien@gmail.com) and I will add it to our Sketch Monday Roster 

Friday, July 13, 2012

Friday Fun Tutorial - Class Final

Hello there... I hope everyone is well. Today has been quite 
HOT to say the least in SoCal. 
Temperatures are rising, kids are more whinny and we have rain.... 
But its a great day to be Stampin with my Friends... That's YOU!!! 

Today's the last and final of our first Friday Fun Tutorial 
and today I wanted to incorporate all the useful
tools and techniques we have learned over the 
past three weeks into one.... So in the project we were working on, 
I'm sure you may have some scraps left over from your card. If you've been following
my Blog - You KNOW I Got Scraps! LOL
So Lets turn those Scraps into something Memorable....


Here I took the opposing side of my Designer Series Paper and distressed
the heck out of it! Really got in there sanding, pulling tearing and sponging.
I created a few corner photo holders and jeweled them


I used some of my stamps and decorated my Very Vanilla Cardstock. 


And here is my two page layout! What do you think? 
I made this as another page layout for my daughters Best Friend Scrapbook. 
I added a small area for her to Journal
and add a few photos, but still left her some 
room to customize it with names and so forth. 
She absolutely fell in love with it

I know we covered a lot of pieces here and I hope you truly learned something new that 
will become useful to you in your own card making/scrapbooking. 
There may be some of you that do best with a demonstration 
of the techniques performed. If so please 
email me at NikkiSapien@gmail.com and I will be glad
to send you the link of my tutorial creating this 
two page layout. 


Tuesday, July 10, 2012

You Call That A Quilt? Mosaic?


Hi there! I hope your week is going spectacular so far. 
Today's Techn{ink} is a very simple one. 
You may have briefly saw it a few weeks back ..

Some people call it a Domino Technique, a Tiled Stamp Technique, a 
Quilt Technique or even a Puzzle Technique.... 
whatever you consider it, is OK with me...
I just think its a Kreative way to use a stamp in a new and Unique way.
I'll go with a Mosaic Technique!


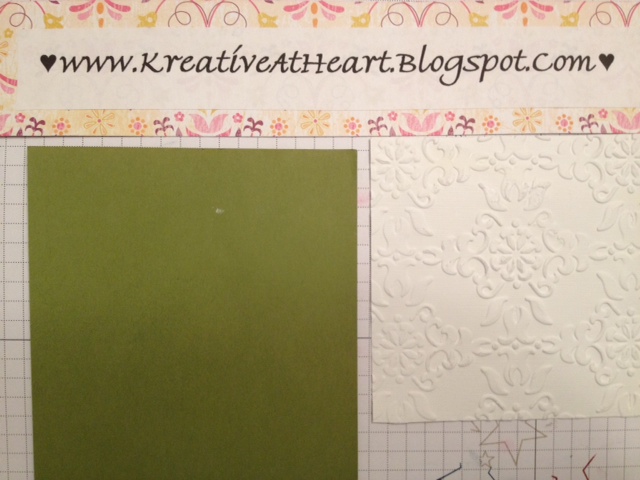
I chose Old Olive cardstock (#100079) for my card base which I cut down to 5" x 10" and folded in half.
Then I took a piece of  Whisper White cardstock (#124302) which I cut down 
to 4 1/2" x 4 1/2" then placed into 
the Vintage Wallpaper Embosslit Folder (#120175) and 
used my Big Shot Die Cutting Machine (#113439) to emboss. 


Next I took a piece of Always Artichoke cardstock (#105119) and 
cut it to 3 3/4" x 3 3/4" for accent.
 Then I cut a piece of Textured Whisper White 3 1/4" x 3 1/4" and 
handstamped my desired image 
in Baja Breeze (#126960) and Garden Green (#126973) ink.

Once the ink was dry I scored the textured, stamped cardstock into Fours 
and glued onto the Always Artichoke cardstock (#105119) then glued 
that portion to the Embossed Piece. Last I used my Snail Adhesive (#104332)
to glue all my layers to my original  Old Olive  Card Base......


And here is the final Card. 


Cardstock: Whisper White Cardstock #100730,  Old Olive #100079 , and Always Artichoke #105119

Ink: Baja Breeze #126960 and Garden Green #126973 

Tools Used:  Big Shot Die Cutting Machine #113439 ,Vintage Wallpaper 
Embosslit Folder #120175 and Snail Adhesive #104332.


Go On ... Give it a Shot

Wednesday, July 4, 2012

CAS Wednesday-Punch-O-Rama


Hello Fellow Stampers and Welcome to 
CAS Wednesday
you know I love them and am delighted to share
PUNCHES!!!! They are so much fun and 
help make the simplest cards even simpler (is that even a word!?!??)

I know today is 4th of July so I wanted to wish you all a 
Happy Independence Day! 
Todays feature isn't very Red White and Blue 
but I still hope you enjoy.


Cardstock color choice for today is Regal Rose (#105130)
Chocolate Chip (#102128) and Whisper White (#124302).


I haven't done too many baby cards so here I selected 
Baby Bundle (w: #118525 c:#120576) with my stamp pads
and my 1 1/4" Square Punch (#119865) 
and Scalloped Square Punch(#119884)
** I find these punches are so handy to have around all year long**


I took a piece of Pretty in Pink Cardstock (#100459) and cut to 4 5/8" x 2 5/8" and 
placed into the Perfect Polka Dot Embosslit Folder (#117335) 
and ran through my Big Shot Die Cut machine (#113439).

Then I cut a piece of Whisper White to 3" x 5" and attached the 
Pretty in Pink card together.
I selected the smaller stamps and colored each by hand with my 
Handy Dandy Stampin Write Markers and used my 1 1/4" square punch (#119865)  
to layer them with a Chocolate Chip and Regal Rose 
Scalloped Square Punch(#119884).

Before I attached all my pieces to the  8 1/2" x 5 1/2" piece of Regal Rose Cardstock 
(which I folded in half to create my card base)
 I wrapped a bow with my 5/8" Organza Ribbon (#114319)
and added the "Congratulations!" Sentiment by using 
the Large Oval Punch (#119855) and a Chocolate Chip Scallop Oval (#119856)

Done and the Labor for this card was under 5 Minutes! 
(giggle! giggle!)


Cardstock:    Pretty in Pink #100459Chocolate Chip #102128Whisper White #124302 and  Regal Rose #105130   
Ink: Chocolate Chip #126979, Regal Rose #126947 and Pretty in Pink #126955
Stamp: Baby Bundle (w: #118525 c:#120576)
Tools Used: 1 1/4" Square Punch (#119865), Scalloped Square Punch(#119884)Perfect Polka Dot Embosslit Folder (#117335) , Big Shot Die Cut machine (#113439),  Scallop Oval (#119856), Large Oval Punch (#119855) and 5/8" Organza Ribbon (#114319)


Tuesday, July 3, 2012

Let Freedom Ring - Techn{ink} Tuesday!

Hello Everyone! Today is Techn{ink} Tuesday and 
its All About... Let Freedom Ring!!

Im feeling Very Patriotic, how are you Celebrating 4th of July?
Its time for BBQ's, Family Fun and Relaxation!?! 
I know I cant wait to be Poolside..

Today I intermixed a Sponging Techn{ink} with a little Twist of Simply Scored....
I have been wanting to show more with this Fascinating Tool 
as an added warning ahead this will get a little messy

So Lets Roll....


 On the left hand side you will see a clean piece of Whisper White cardstock (#124302)
This is trimmed to 3 5/8" x 4 7/8" before beginning the next step 
I wanted to Stamp my image before I began to use 
my Simply Scored Tool (#122334). Here you see my image stamped in Midnight Muse (#126860)

On the right hand side you will see my images are stamped as desired and 
using my  Simply Scored Tool (#122334) 
 I scored a line right above my image.


Here you see (on left hand side) I turned my card right side up and began to score every 1/4"
You will want to turn your card UPSIDE down to get the desired score marks
in order to continue with this project. So now all your scored marks are
RAISED, right side up!


Next is where it gets a little messy. Using Crumb Cake (#121030), Marina Mist (#126962)
were going to begin our Antiquing Techn{ink}. First sponge with 
Crumb Cake  softly to get that slightly discolored affect (to lessen the white)
then sponge with  Marina Mist  to add the denim affect.
**These colors alone are Spectacular!!**


On the left side you see Im now sponging with Riding Hood Red (#126968) 
and on the left I needed a "walnut type stain" so I sponged with Soft Suede (#126978)
You can definitely see why having the scored lines raised were needed
to capture the colors accurately.


Lastly I attached the Antiqued Techn{ink} to my 3 3/4" x 5" piece of 
Midnight Muse Cardstock (#126843).
You can see the colors enhance and take nicely. 
And on the left is our final image.
You can see I added a few embellishments to adorn the 
Distressed Bakers Twine I selected.
If you don't recall how to color the twine to customize it 
for your project. CLICK HERE
After adding the ribbon and embellishments I glued this to 
a piece of 8 1/2" x 5 1/2" Riding Hood Red Cardstock (#111348)


And Heres The Added Bonus...


Did you know that the Simply Scored can be used to also create CUSTOM ENVELOPES!?! 
Seriously, its the perfect answer to all the left over cardstock you have
lying around! 
I added some extra Distressing and Stamped the interior lip of the envelope 
and now its customized to coordinate with my card! 


Simply Scored Wants YOU!!!

Cardstock: Whisper White Cardstock #100730, Red Riding Hood #111348, and Midnight Muse #126843.

Ink: Crumb Cake #126975, Midnight Muse #126860, and 
Red Riding Hood #126968, Marina Mist #126962 and Soft Suede #126978.

Tools Used:  Simply Scored Tool #122334, Antique Brads #117273 
Snail Adhesive #104332 and sponges #101610.


I hope everyone has a Wonderful and Safe Fourth of July
and 
May God Bless Our Troops!


Friday, June 29, 2012

Fun Friday Tutorial Part 2


Hello Friends and Welcome back for 
Part 2 
of my 
Friday Fun Tutorial

Last week we left off with layering 
and adding touches of color. 

Here you see a simple ensemble (Left)
and on the Right you see where I added a
small layer of Crumb Cake to our Blue and White featured project


As mentioned, today we are going to discuss 
further into ink colors. Initially if you recall, I was excited to experiment 
with my stamp set and see where I was truly going with it. 
Not paying much attention to color and ink


Bashful Blue, White and ink was in More Mustard.... 
These colors aren't horrible, I wont mention what I thought of 
but obviously wasn't the direction I 
was hoping for.... 


To help aid me in this next task I brought out my 
Color Coach (#120148)
With so many fascinating colors to 
choose from and not wanting to make the wrong choice
I had to really see each and every color
Stampin Up had to help me be sure of the Right direction. 


After shifting through all the colors in my Color Coach
I compared my initial choices of color to the 
ones that fit just Perfect!

Can you see the stark color choices I had compared to 
a more subtle, soft and welcoming choices I selected?

And Taadaaa! My card was born!!
(Well ... Almost.. Were not done yet)


So there it was.... 
See my beginning card compared to 
a mild make over and finally how changing my Ink choice, 
adding Layers and an additional Designer Paper
can make such a Wise Move!?! 

I would REALLY love to see you 
try the same, start out a card with
random colors and grab some colors. 
And Stamp It!

I DOUBLE DOG DARE YOU!!!!

Sit and rethink... 
"What could I do different?" 
and send me your before and after! 
***Email me your before and after card to NikkiSapien@Gmail.com***
I will enter everyone 
who submits their cards in an email into a drawing
for a free stamp and ink of my choice!
A FREE STAMP AND INK AND ALL YOU HAVE TO DO IS EMAIL 
ME YOUR BEFORE AND AFTER CARD
ALONG WITH YOUR CONTACT INFO

So, come on ... Stamp and Send...

and I know your going to ask.... 
what could possibly be next?? 

Oh there is more... and your just going to have to follow along 
to see! :)

Happy Stampin

***AND LAST REMINDER***
ONLY 1 DAY LEFT!!!
I'M OFFERING 20% OFF OF ALL 
NEW CATALOG PRODUCTS

VALID ONLY UNTIL SATURDAY JUNE 30, 2012
<<MINIMUM $25 PURCHASE>>
ANYTHING YOU WANT FROM OUR CATALOG FOR 20% OFF!
YOU HAVE TO EMAIL ME YOUR ORDER AT NIKKI.SAPIEN@YAHOO.COM 
WITH ALL YOUR CONTACT AND PAYMENT INFORMATION
OR 
IF YOU PLACE YOUR ORDER ON MY WEBSITE YOU WILL RECEIVE YOUR 
20% REBATE FROM ME ONCE PAYMENT HAS BEEN POSTED 
(USUALLY WITHIN 7-10 BUSINESS DAYS) 
PLUS....
THE FIRST THREE PEOPLE WHO PURCHASE
WILL RECEIVE A 6X6 SAMPLER PACK OF THE FEATURED 
2011-2013 IN COLOR CARDSTOCK AND 
2011-2013 DESIGNER SERIES PAPER!!!
THATS A $20.95 VALUE-FREE 
THESE COLORS ARE DREAMY AND CAN BE
A CORE ELEMENT TO ALL OF YOUR CRAFTING!!
.......THERE'S STILL TIME AND CLOCK IS TICKING.......