Wednesday, July 18, 2012

Get Well Soon


It's CAS Wednesday and here I am 
sharing a simple yet 
thoughtful ensemble of
DSP and Get Well Soon Sentiment.

This card is simple enough to even make using your Scrap pile! 
PLUS.... it took less than 2 minutes!! 

Speaking of a quick 2 minutes, enjoy this quick tutorial I made for you


Cardstock: Whisper White Cardstock #100730, Lucky Limeade (#122977), and Calypso Coral (#126983)
DSP: Everyday Enchantment (#126154) 
Ink: Basic Black(#126980)
Tools:  Blossom Punch (#12563),  Postage Stamp (#122344), Itty Bitty Shapes Punch Pack (#118309), Everyday Enchantment Brad Pack (Retired) and Snail Adhesive (#104332.)


Tuesday, July 17, 2012

Faux Silk-For YOU!

Hi Friends... Todays Techn{ink} Tuesday
Faux Silk

This Techn{ink} took less than 2 minutes and although I was a 
little uncertain about it in the beginning, Im so excited about how it came out. 

Lets get started


First you will take a clean piece of Tissue Paper and cut it down 
to the dimension you will need, I used a 5" x 5 1/2"

You can use which ever stamp you would like, but 
here I used Music Notes (#120327) with 
a little help from my Stampin Around Handle (#102971)
and dipped into More Mustard (#126964)

Once that was dried I crinkled and wrinkled it into the little ball you see
I unwrapped and did it a couple times to get my Tissue Paper 
very wrinkled


I simply unwrapped the Tissue Paper
**do not flatten and roughen out any wrinkles**
and I adhered to my 4 1/2" x 5" Very Vanilla cardstock
using my Glue Stick (#104045)

Once this was done, placing the card upside down to avoid ripping
I trimmed this portion of my card to its final size of 3 3/4" x 5" 
using my Stampin Trimmer (#126889)

After adding a few embellishments, I attached to a final cardstock 
of Not Quite Navy (#101722) cut to 8" x 5 1/2" and folded in half


Heres our final card and I enhanced the photo a bit to show the Faux Silk Detail. 
I think it came out quite beautiful. This card just sings to me, 
I hope you enjoyed this quick 
Tuesday Techn{ink}


Cardstock: 
Very Vanilla #101650, Soft Suede #115318, 

and Not Quite Navy #101722 

Ink: More Mustard #126964, Not Quite Navy #126971 and 
Crumb Cake #126975


Stamps: Timeless Treasures #120615 and Music Notes #120327

Tools:  Big Shot #113439, Labels Collection Framelits #125598, Decorative Label #120907, Stampin Trimmer #106959, Stampin Around Handle #102971, 
Taffeta Ribbon #109070Victoria Lace #118481, Glue Stick #104045, 
Dimensionals #104430 and Snail Adhesive #104332

Monday, July 16, 2012

My Monday's a bit Sketchy....

Hiddee Hooo Kreative Krew!!! 

Happy Monday.... 
If you are a daily follower you know that I try to at least 
post once a day on my Blog. And well....My Mondays and Fridays
 are kind of a bit what you would say "under construction".... 
But I think I found a solution to my Kreative Block! 

There are like a Million Guzillion Trillion 
blogs out there for "sketch this", "sketch that", "sketch challenge here"
"scratch that challenge" there & "pick a color challenge instead" ...

These challenges are all over the internet for every day of the week 
and by the time I can even see straight I've already missed out on it
(maybe you would say...that's MY challenge!)

Its enough to swirl you into next TUESDAYS challenge...
{hahahahah}

Anyway, I just seek a challenge to break me OUT of my Kreative Block at times and help me discover new layouts I would have not thought of
or color ensembles that I would have NEVER put together.

So among all these blog challenges I'm introducing my own twist
~My Sketchy Monday~

Looking over these sites and possible layouts I want to embark on new 
personal challenges and they might spark interest of yours too. 
Maybe you hit that "block" occasionally and could use a little help. 


 Here is today's Sketch It Challenge.  
Found Here
I created this card using a 6x6 card layout and built from there. 
Not too bad, but here was a challenge I felt would help me break out of my 
anti-layering funk. The card was fun
but I can Definitely see this best as a Scrapbook Layout
***What do you think?***

Rules To Join Along:
Anyone can join!! Customers, New Friends and/or Fellow Demos
Challenges Must be done using SU Product Only (Retired or Current)
Please Link back to MY Blog from your Blog Post
Please leave your Blog address below in the comment field so we call all view 
your layout leave you a comment.... and most IMPORTANTLY
Have FUN!

And if there is a Sketch blog you would like me to consider
please send me an email (NikkiSapien@gmail.com) and I will add it to our Sketch Monday Roster 

Friday, July 13, 2012

Friday Fun Tutorial - Class Final

Hello there... I hope everyone is well. Today has been quite 
HOT to say the least in SoCal. 
Temperatures are rising, kids are more whinny and we have rain.... 
But its a great day to be Stampin with my Friends... That's YOU!!! 

Today's the last and final of our first Friday Fun Tutorial 
and today I wanted to incorporate all the useful
tools and techniques we have learned over the 
past three weeks into one.... So in the project we were working on, 
I'm sure you may have some scraps left over from your card. If you've been following
my Blog - You KNOW I Got Scraps! LOL
So Lets turn those Scraps into something Memorable....


Here I took the opposing side of my Designer Series Paper and distressed
the heck out of it! Really got in there sanding, pulling tearing and sponging.
I created a few corner photo holders and jeweled them


I used some of my stamps and decorated my Very Vanilla Cardstock. 


And here is my two page layout! What do you think? 
I made this as another page layout for my daughters Best Friend Scrapbook. 
I added a small area for her to Journal
and add a few photos, but still left her some 
room to customize it with names and so forth. 
She absolutely fell in love with it

I know we covered a lot of pieces here and I hope you truly learned something new that 
will become useful to you in your own card making/scrapbooking. 
There may be some of you that do best with a demonstration 
of the techniques performed. If so please 
email me at NikkiSapien@gmail.com and I will be glad
to send you the link of my tutorial creating this 
two page layout. 


Thursday, July 12, 2012

Something Old, Something New, Something Borrowed and Something Blue...

Todays Thursday Thrill.... 

Something Old, Something NEW, Something Borrowed and Something Blue...

When I started to build my Post for today I didn't have any intention of where it took me. 
In the end, I saw what I accomplished and 
the title was perfectly suited to what was kreated and great ideas to share. 

I took my Mixed Bunch(w: #125535 c: #125537) and Blossom Punch(#125603) yesterday afternoon and sat in my Kreative Corner
and so came to me....

Something Old...


You may have seen me post this ensemble before, I CAS'd this card from fellow Demo 
and good friend, Christena Bagne. When I saw this card I just had to recreate it! 
There is something about Daffodil Delight Im in love with....
 It's so SUNNY & CHEERFUL! 
Here I used BOTH  Mixed Bunch and Bossom Punch

Something NEW...


I took a piece of clean Crumb Cake(#120953) 
and using Crumb Cake Ink (#126975) began stamping 
my background image to create my own Designed Paper.
Then I attached that to my Rich Razzleberry Cardstock (#115316)
and added a strip of Floral District DSP(#126919)
Last I took Mixed Bunch Stamp, inked in Tangerine Tango (#126946)

Afterward, I used my 1 3/4" Scallop Circle Punch (#119854) to pop out my image. 
Using a piece of scrap paper and my Snail Adhesive (#104332), 
created a small semi sticky strip to be my guide for the next step.

 You will place the Punched image back into the same punch using the handmade
guide then turning the scallop semi clockwise, punch again.
**The image will no longer be scalloped but now like a sun burst**


 Here is how your final punched image will look. 
Using the same stamp I used for my Crumb Cake background, 
I used Rich Razzleberry Ink (#126950) and created a small center for each flower. 
Using my Handy Dandy Stampin Up Markers, I added small sunbursts to the image with accent colors.


I also used the Blossom Punch (#125603) to create fun little 
leaves in Lucky Limeade(#122977)
and here is the completed card.


Can you find where I used my Blossom Punch(#125603)  in this card? 

Something Borrowed....


Still determined to find something unique and using the same Blossom Punch, 
I came across this GORGEOUS card created by 
fellow demo, LeeAnn's Happy Hibiscus
How unique is this beautiful card!?! 

LeeAnn used Stamps-Happy Hour(w: #126640 wc: #126642), 
Teeny Tiny Wishes (w: #115370 c: #127802)
Paper-Whisper White, Calypso Coral, Daffodil Delight and Lucky Limeade
Ink-Lucky Limeade, Daffodil Delight, Calypso Coral
Tools: Scallop Edge Punch, Word Window Punch, and Blossom Punch

Something Blue..


Using the same Blossom Punch, did you know you can create these too? 
I stamped my Mixed Bunch lacy image in Marina Mist (#126962) 
onto Vellum paper (#101856)
and using the Blossom Punch, I carved these elegant little Butterflies.
I adorned them with both size Pearl Jewels (Reg:119247 & Lrg: 125577)


 So there you have it, using just the Mixed Bunch Stamp Set and Blossom Punch
how many different pieces can you come up with or have you come up with? 

I know there are TONS of beautiful possibilities out there, and when you are 
determined to sit and REALLY use what you have around... 
YOU TOO can come up with some amazing projects! 
Give it a try. 


My last but NOT least Thrill for today is I finally created my FIRST video: 
(please be gentle on me)


I hoped you found all this information helpful and useful. 
Thank you for joining me


Cardstock: Whisper White Cardstock #100730,  Very Vanilla (#101650), Crumb Cake (#120953), Rich Razzleberry (#115316), Lucky Limeade (#122977), 
DSP and Vellum (#101856) 
Ink: Daffodil Delight (#126944), Marina Mist (#126962) and 
Crumb Cake (#126975)
Tools:  Blossom Punch (#12563),  Scallop Circle Punch (#119854), Scallop Oval (#119856) Decorative Label (#120907), Pearl Jewels (Reg:119247 & Lrg: 125577), Brights Buttons(#119747) and Snail Adhesive (#104332.)

Wednesday, July 11, 2012

Scrap My Heart and Scrapbook It!

Welcome back fellow Stampers!!

After sharing my card with my LATE NIGHT STAMPERS
GROUP, I received such a positive response
and had so many people asking me  
"How did you do that?" 
that I just had to share!!! 

I didn't know if I should consider this Post a new Techn{ink} 
or a CAS but there is a fine, translucent almost 
Vellum like line between the two! (giggle) 

This project consists of mainly using Scraps, 
I have so many and I'm so embarrassed to even show this next photo
but I'm being Honest when I say this is only a sixteenth of 
scraps I have...


Im sure you fellow Scrap-a-holics can agree, you have your own pile 
of scraps too. So I took out my little Punches and sat until I 
found a way to Use those Scraps!


I took out my Large Heart Punch (#119883) and selected a very patterned 
scrap of paper to start punching with..
{"Scrap" my "Heart"}


On the Left you see I took that same punched out heart and slid back 
into the punch -lining up the corners and rounded edge.
Then Punch again and here is what you will get...


Image on the Right is how it appears after I use my Paper Snips (#103579) **BTW the MOST fabulous pair of Snips I have ever had!!!**
and rounded off the opposing side, now I have two tear drops

If that is too much info for you, you can use the same AWESOME 
Paper Snips (#103579)
cutting the heart in half and round the sharp edges...
I punched out as many hearts as my little hands could because 
I don't know about you, 
but I'm so tired of having so MANY scraps around!
** I bet my husband would agree**
But seeing my initial photo, I bet you didn't know that was taken
AFTER I made this project! (Buhaaha)


I punched out the center of my flower with my 
1/14" Circle Punch (#119861)
Then this next part is a bit tricky. You will want to build your 
flower from the outside in. I used a minimal amount of 
Multipurpose Glue (#110755) so that I could 
re-position the petals as I needed. One layer at a time and so that 
they would lie over one another.
(See photos)


In the end I saw there were some areas that could 
still use more petals, so I just added these in 
at the end. I wanted to cover every part I could, you will need to
flip the card over and using your 
AWESOME Paper Snips (#103579) cut away the excess petals.


Stamp a quick sentiment and there you go. It takes a little getting used to but
after your familiar with what you are doing, it takes less than 5 min!

Were not done yet..
There is a BONUS feature-SCRAPBOOK IT!!! 


I decided since I was making this card, and I have PLENTY of Scraps, 
I wanted to surprise my daughter and make her
a two-page layout for her scrapbook too! 

In order to do this, I found it easier to start in the opposite 
direction than before. 
Since the overall image was larger, I used my 
1 3/4" Circle Punch (#110850) and built the inside of my 
flower by gluing the petals upside down to the center circle. 
Once I had the initial layer completed,
I flipped it over and adhered to the page. Then using the 
same Multipurpose Glue (#110755) I built my flower from the inside outward. 


Here is a close up and ...


Add your journal/photo spaces and 
Our Two Page layout is complete!! 
And UNDER 7 minutes

I hope you enjoyed this tutorial and that you too will have fun
Kreating this beautiful card and Scrapbook layout too. 

Cool Tools: Large Heart Punch (#119883), 1/14" Circle Punch (#119861),
 Paper Snips (#103579), 1 3/4" Circle Punch (#110850) ,  
and Multipurpose Glue (#110755) 

Tuesday, July 10, 2012

You Call That A Quilt? Mosaic?


Hi there! I hope your week is going spectacular so far. 
Today's Techn{ink} is a very simple one. 
You may have briefly saw it a few weeks back ..

Some people call it a Domino Technique, a Tiled Stamp Technique, a 
Quilt Technique or even a Puzzle Technique.... 
whatever you consider it, is OK with me...
I just think its a Kreative way to use a stamp in a new and Unique way.
I'll go with a Mosaic Technique!


I chose Old Olive cardstock (#100079) for my card base which I cut down to 5" x 10" and folded in half.
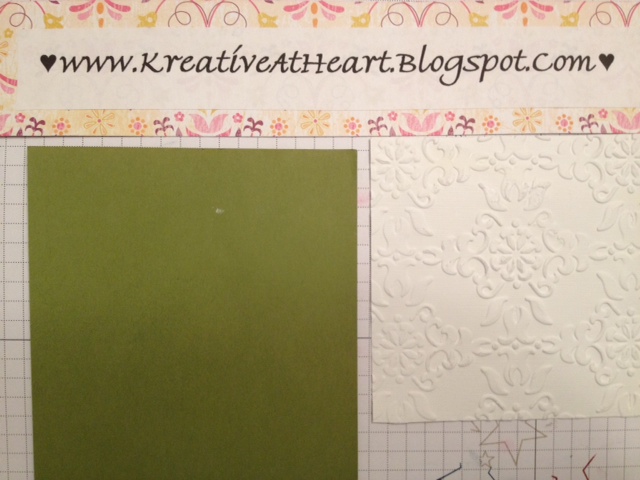
Then I took a piece of  Whisper White cardstock (#124302) which I cut down 
to 4 1/2" x 4 1/2" then placed into 
the Vintage Wallpaper Embosslit Folder (#120175) and 
used my Big Shot Die Cutting Machine (#113439) to emboss. 


Next I took a piece of Always Artichoke cardstock (#105119) and 
cut it to 3 3/4" x 3 3/4" for accent.
 Then I cut a piece of Textured Whisper White 3 1/4" x 3 1/4" and 
handstamped my desired image 
in Baja Breeze (#126960) and Garden Green (#126973) ink.

Once the ink was dry I scored the textured, stamped cardstock into Fours 
and glued onto the Always Artichoke cardstock (#105119) then glued 
that portion to the Embossed Piece. Last I used my Snail Adhesive (#104332)
to glue all my layers to my original  Old Olive  Card Base......


And here is the final Card. 


Cardstock: Whisper White Cardstock #100730,  Old Olive #100079 , and Always Artichoke #105119

Ink: Baja Breeze #126960 and Garden Green #126973 

Tools Used:  Big Shot Die Cutting Machine #113439 ,Vintage Wallpaper 
Embosslit Folder #120175 and Snail Adhesive #104332.


Go On ... Give it a Shot