Friday, June 29, 2012

Fun Friday Tutorial Part 2


Hello Friends and Welcome back for 
Part 2 
of my 
Friday Fun Tutorial

Last week we left off with layering 
and adding touches of color. 

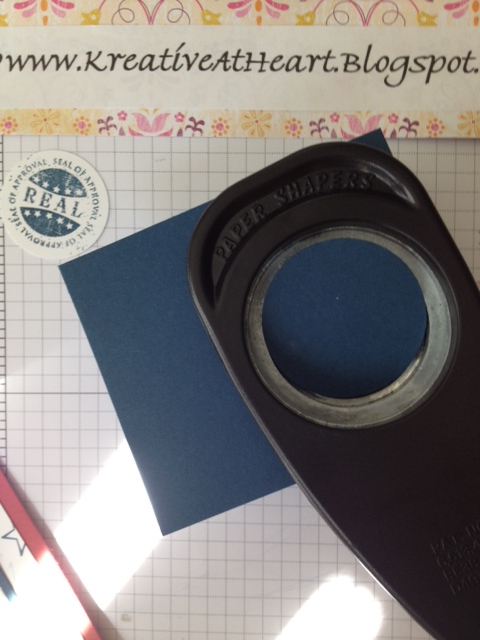
Here you see a simple ensemble (Left)
and on the Right you see where I added a
small layer of Crumb Cake to our Blue and White featured project


As mentioned, today we are going to discuss 
further into ink colors. Initially if you recall, I was excited to experiment 
with my stamp set and see where I was truly going with it. 
Not paying much attention to color and ink


Bashful Blue, White and ink was in More Mustard.... 
These colors aren't horrible, I wont mention what I thought of 
but obviously wasn't the direction I 
was hoping for.... 


To help aid me in this next task I brought out my 
Color Coach (#120148)
With so many fascinating colors to 
choose from and not wanting to make the wrong choice
I had to really see each and every color
Stampin Up had to help me be sure of the Right direction. 


After shifting through all the colors in my Color Coach
I compared my initial choices of color to the 
ones that fit just Perfect!

Can you see the stark color choices I had compared to 
a more subtle, soft and welcoming choices I selected?

And Taadaaa! My card was born!!
(Well ... Almost.. Were not done yet)


So there it was.... 
See my beginning card compared to 
a mild make over and finally how changing my Ink choice, 
adding Layers and an additional Designer Paper
can make such a Wise Move!?! 

I would REALLY love to see you 
try the same, start out a card with
random colors and grab some colors. 
And Stamp It!

I DOUBLE DOG DARE YOU!!!!

Sit and rethink... 
"What could I do different?" 
and send me your before and after! 
***Email me your before and after card to NikkiSapien@Gmail.com***
I will enter everyone 
who submits their cards in an email into a drawing
for a free stamp and ink of my choice!
A FREE STAMP AND INK AND ALL YOU HAVE TO DO IS EMAIL 
ME YOUR BEFORE AND AFTER CARD
ALONG WITH YOUR CONTACT INFO

So, come on ... Stamp and Send...

and I know your going to ask.... 
what could possibly be next?? 

Oh there is more... and your just going to have to follow along 
to see! :)

Happy Stampin

***AND LAST REMINDER***
ONLY 1 DAY LEFT!!!
I'M OFFERING 20% OFF OF ALL 
NEW CATALOG PRODUCTS

VALID ONLY UNTIL SATURDAY JUNE 30, 2012
<<MINIMUM $25 PURCHASE>>
ANYTHING YOU WANT FROM OUR CATALOG FOR 20% OFF!
YOU HAVE TO EMAIL ME YOUR ORDER AT NIKKI.SAPIEN@YAHOO.COM 
WITH ALL YOUR CONTACT AND PAYMENT INFORMATION
OR 
IF YOU PLACE YOUR ORDER ON MY WEBSITE YOU WILL RECEIVE YOUR 
20% REBATE FROM ME ONCE PAYMENT HAS BEEN POSTED 
(USUALLY WITHIN 7-10 BUSINESS DAYS) 
PLUS....
THE FIRST THREE PEOPLE WHO PURCHASE
WILL RECEIVE A 6X6 SAMPLER PACK OF THE FEATURED 
2011-2013 IN COLOR CARDSTOCK AND 
2011-2013 DESIGNER SERIES PAPER!!!
THATS A $20.95 VALUE-FREE 
THESE COLORS ARE DREAMY AND CAN BE
A CORE ELEMENT TO ALL OF YOUR CRAFTING!!
.......THERE'S STILL TIME AND CLOCK IS TICKING.......


Thursday, June 28, 2012

Thursday Thrill

Hey All!!

Welcome back!!

I have a couple of card shares for you on today's 
Thursday Thrill

wanted to feature 
One Stamp Two Ways


For the first card I tried for more of deeper hues and chose to use colors
Pacific Point #111350, Tempting Turquoise #102067, Daffodil Delight #119683 and Whisper White #100730


The stamp set used is Fresh Vintage Stamps Set (w:125115  c:125117).
 I colored the floral set using Stampin Up markers in colors Daffodil Delight
Garden Green, and Tempting Turquoise onto a clean sheet of Whisper White.
Then using my 1 1/4" Square Punch (#119865) 
I selected what portions of the images I wanted to use for my card. 


The colors came out so vibrant and crisp 
you'd never think it was colored by hand....
Sentiment is from the Word Play Set (w: 120308 c: 120651)


And the inside of the card I added a little feature too from extra
pieces I had of the square punches. 

NEXT.... 


The colors chosen here are Chocolate Chip #102128, Whisper White #124302 
and Calypso Coral** #122976 
** added plug this is one of the featured colors I have in my 
GIVEAWAY only offered this week**

The Designer Series Paper you see in the background is from 
Everyday Enchantment  #126154; we will also use this 
paper two different ways as well!


Here you see I used the same Fresh Vintage Stamps 
Set (w:125115  c:125117) in only Chocolate Chip #126979

I added a tear feature on the Whisper White for texture. 
And the sentiment shown is from the Friendly Phases Set (w: 126149 c: 126151)
but I only featured the portion of the sentiment I wanted
again using Stampin Up Markers.

Having the luxury of markers in the exact same 
color as my inks and paper helps to accentuate 
and coordinate just exactly what I need- No Hassel. 

Then I used the floral Calypso Coral pattern for the background of the card to
introduce the Color in Cardstock as well as in the  Everyday 
Enchantment  #126154 Designer Series Paper
but flipped the paper over (because its printed on both sides)
to use the stripes as a pop of 
new color to introduce to the project. 

Simple Clean and Cool!! 


Designer Series Paper: Everyday Enchantment  #126154
Cardstock:  Pacific Point #111350Tempting Turquoise #102067Daffodil Delight #119683, Chocolate Chip #102128Whisper White #124302 and Calypso Coral #122976 
Ink: Chocolate Chip #126979
Stamp: Fresh Vintage Stamps Set (w:125115  c:125117), Word Play Set (w: 120308 c: 120651), and Friendly Phases Set (w: 126149 c: 126151)
Tools Used: 1 1/4" Square Punch (#119865), Curly Label Punch (#119851) and Decorative Label Punch (#120907)


***AND DONT FORGET***
ONLY 2 DAYS LEFT!!!
I'M OFFERING 20% OFF OF ALL 
NEW CATALOG PRODUCTS

VALID ONLY UNTIL SATURDAY JUNE 30, 2012
<<MINIMUM $25 PURCHASE>>
ANYTHING YOU WANT FROM OUR CATALOG FOR 20% OFF!
YOU HAVE TO EMAIL ME YOUR ORDER AT NIKKI.SAPIEN@YAHOO.COM 
WITH ALL YOUR CONTACT AND PAYMENT INFORMATION
OR 
IF YOU PLACE YOUR ORDER ON MY WEBSITE YOU WILL RECEIVE YOUR 
20% REBATE FROM ME ONCE PAYMENT HAS BEEN POSTED 
(USUALLY WITHIN 7-10 BUSINESS DAYS) 
PLUS....
THE FIRST THREE PEOPLE WHO PURCHASE
WILL RECEIVE A 6X6 SAMPLER PACK OF THE FEATURED 
2011-2013 IN COLOR CARDSTOCK AND 
2011-2013 DESIGNER SERIES PAPER!!!
THATS A $20.95 VALUE-FREE 
THESE COLORS ARE DREAMY AND CAN BE
A CORE ELEMENT TO ALL OF YOUR CRAFTING!!


Wednesday, June 27, 2012

Clean and Cool CAS Wednesday


Todays CAS (Clean and Simple) card is extra special!! Not only was this 
CAS quick and easy to create! 
3 minutes and DONE!

Today's highlight is to show how simple, clean and cool our 
2011-2013 In Colors are!! (Which are Still Available)

***PLUS A SPECIAL OFFER AT THE END OF THIS POST***


The In Colors I selected to use were Pool Party (#122924), Lucky Limeade (#122926), Wisteria Wonder (#122922) and Calypso Coral (#122925)
I honestly cant remember exactly where the idea for this card came 
but I do believe I something similar shown on 
a really cool website SplitCoast Stampers


Plus I wanted to highlight Stampin Up's AWESOME Paper Piercing Tool (#126189) and Mat (#126199) are!!!  

I have used this tool for all my projects from assisting me in 
attaching brads to accenting (as seen)

I love how simple SU! makes Paper crafting so Simple! 
No more wasted time in 50 different tools and crunchers 
to achieve the look I want! My time is valuable!


Simply line up where you want your accent to be with your 
Piercing Mat and Pierce! 


SO AWESOME, ANYONE CAN DO IT !!!


Designer Series Paper: Designer Series Paper Stack #122384
Cardstock: Pool Party #122924, Lucky Limeade #122926, Wisteria Wonder #122922, Calypso Coral #122925 and Whisper White #124302. 
Ink: Pool Party #126982
Stamp: Curly Cute (w:117014 c: 120510)
Embellishments: In Color Printed Brads #122940 and Island Indigo 3/8" Ruffled Ribbon #122974
Tools Used: Paper Piercing Tool (#126189) and Mat (#126199)


***TODAY'S EXTRA SPECIAL TREAT***
3 DAYS ONLY!!!
I'M OFFERING 20% OFF OF ALL 
NEW CATALOG PRODUCTS

VALID ONLY UNTIL SATURDAY JUNE 30, 2012
<<MINIMUM $25 PURCHASE>>
ANYTHING YOU WANT FROM OUR CATALOG FOR 20% OFF!
YOU HAVE TO EMAIL ME YOUR ORDER AT NIKKI.SAPIEN@YAHOO.COM 
WITH ALL YOUR CONTACT AND PAYMENT INFORMATION
OR 
IF YOU PLACE YOUR ORDER ON MY WEBSITE YOU WILL RECEIVE YOUR 
20% REBATE FROM ME ONCE PAYMENT HAS BEEN POSTED 
(USUALLY WITHIN 7-10 BUSINESS DAYS) 
PLUS....
THE FIRST THREE PEOPLE WHO PURCHASE
WILL RECEIVE A 6X6 SAMPLER PACK OF THE FEATURED 
2011-2013 IN COLOR CARDSTOCK AND 
DESIGNER SERIES PAPER SHOWN TODAY!!!
THATS A $20.95 VALUE-FREE


Tuesday, June 26, 2012

Techn{ink} Tuesday

Hello My Stampin Friends!!! 

The temperature is a blistering 100 degrees outside! 
Summer is finally here and you can smell the BBQ's blazing and laughter in the air as all
 the neighborhood kids are finally out of school!
Seeing as it is nearing the end of June temperatures are peaking 
it reminded me of an upcoming Holiday!
 4th of July 
 So since it was time for another Techn{ink} Tuesday 
I thought I'd incorporate the theme with the Techn{ink} I have today.

This Techn{ink} might be referred to some by different names but I call it the 

Triple Layer Stamping Techn{ink}


Here are step by step instructions:


First you will need a clean piece of Cardstock, your Classic Ink and Cardstock.
I began with Whisper White Cardstock (#100730) and labeled each with their dimensions, since you probably can barely see (I used pencil) 
the dimensions should be:
First layer cut to 2"x3 1/4", Second layer cut to 3"x4 1/4" and the Last layer cut to 4" x 5 1/4"


Now cut your Cardstock down to matting dimensions for each layer. 
I chose Red Riding Hood (#111348) and Midnight Muse (#126843). 
First layer measures 2 1/4" x 3 1/2", Second layer is 3 1/4" x 4 1/2" and the Last layer is 8 1/2" x 5 1/2" (Yes that is correct ... 8 1/2". This layer will be your card base so fold it in half to create a final dimension of 4 1/2" x 5 1/2"
Now set this aside. 


Bringing back your Whisper White Cardstock (#100730)
place a small sticky strip with your Snail Adhesive (#104332) and touch it enough to lessen the stickiness. You will layer each piece together (See on Right) accordingly but will want to be able to detach each layer after the next portion of this Techn{ink}
 (I hope that makes sense)


Now using your ink and your imaging stamp, begining stamping in the middle of your Triple Layers of your Whisper White Cardstock (#100730)
I first inked my images using Crumb Cake (#126975), then Midnight Muse (#126860) and finished with Red Riding Hood (#126968)


When you pull the three layers apart (See Image on Left) this is how it will look. 
Even using this Techn{ink} would be fun to use the layers separate as a background to a photo or journaling. ** Lightbulb** 
NOTE: Be sure to not turn your images or layers clockwise or out of order or else each layer wont match up identically with its coordinating layer. 
You will want it to appear the layers were never separated. 
Attach the first and second layer to the appropriate Cardstock, 
but Don't attach the Third layer just yet!


Were almost finished, before attaching the Third layer, I wanted to add some Bakers Twine. Here is another Techn{ink} I learned from my wonderful Upline, Wendy Cranford! Here I cut 28" of my Whisper White Bakers Twine (#124262)
my Midnight Muse ink (#126860) and a Sponge Dobber (#101610). 
I wanted to color my Whisper White Bakers Twine (#124262) to match my Midnight Muse Cardstock and ink. 
*How you ask?? Simply take your Whisper White Bakers Twine (#124262)and  Dobber (#101610) , softly pressing into the ink pad and Taadaa! 
You now have Customized Twine to coordinate with your project! 
How fabulous is THAT!?! 


Lastly, using the Snail Adhesive (#104332) again, liberally, I adhered my 
Midnight Muse Twine behind the First and Second layer, tying in a knot. 
And finally attaching to the last layer. (See Left)


I found a perfect Stamp to finalize my card and stamped the image in
 Midnight Muse ink onto Whisper White (#100730) 
Using my Stampin Up circle punches 
(because all SU! punches coordinate with each and every stamp set - For quick and easy building) 
I punched a 1 3/4" circle (#119850)  in Midnight Muse (#126843), then a 1 3/8" circle (#119860) in Red Riding Hood (#111348) and my final stamped image in 1 1/4" circle (#119861) 
I attached all three layers together with my Snail Adhesive(#104332)
and add a dimensional (#104430) to adhere circle to the card


Here is our completed image!! 
It was SO MUCH FUN!! You will see I even  
added a few colorful brads at the top left corner! 


Here is the inside of the card too.

Cardstock: Whisper White Cardstock #100730, Red Riding Hood #111348, and Midnight Muse #126843.

Ink: Crumb Cake #126975, Midnight Muse #126860, and 
Red Riding Hood #126968.

Tools Used: 1 3/4" circle punch #1198501 3/8" circle punch #119860,1 1/4" circle punch #119861, Whisper White Bakers Twine #124262, 
Snail Adhesive #104332 and dimensionals #104430.