Friday, July 6, 2012

Friday Fun Tutorial Part 3


Hello!!! Im so glad to see your back for 
Part 3
of my 
Friday Fun Tutorial

Last week ended by learning the helpful and creative ways
on how to select the right Ink colors. 

Today I wanted to show you a small yet useful tip 
that could help you on your next project. 

**In order to better understand what I'm 
presenting you, I will be enlarging these images so you can 
more clearly, I hope **


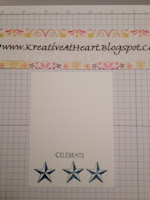
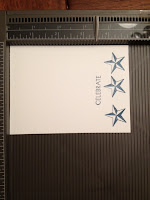
Can you see a difference between these two images? The piece on the right 
is more vivid in color compared to the piece on the left. 
Why? I wanted to add a Distressing Techn{ink} to 
show more of an aged effect on my card. 

How did I do this? I took the Sanding Block from my 
Stampin Sanding System (#129367) 
and began to rub the edges and my paper to the desired level of distressing. 
What a little difference a little Sanding can make, right? 


Here's and upclose of the paper on my card in its Original state, 
in the center you see it in its Sanded form and
NOW..... to the far right.... I wanted to show you how it would look if you took 
the Sanded form, and by using a lightly inked Sponge Dobber (#101610)
in the Ink Color we chose last week (Crumb Cake #126975),
how it would really warm and change up the entire appearance. 
I applied this Sanded and Sponge Techn{ink} to each layer on my card.

Not too shabby, right? 
Well.... maybe it is a little Shabby Chic but you know that's how I roll!!! :)


Again, here is the Original versus the Distress and Antiqued final product. 
I even took my Round Corner Edge Punch to softened the edges on my front cardstock.


So there you have it class our Final Product. I think it came out wonderfully. 
Don't you think? Any questions class?

Have you tried this Distress and Antique Techn{ink}? 
If not, you should really try it sometime. In some situations it just may do wonders
for the project you are currently working on. 

And don't forget to 
 send me your before and after! 

***Email me your before and after card to NikkiSapien@Gmail.com***
I will enter everyone 
who submits their cards in an email into a drawing
for a free stamp and ink of my choice!
**A FREE STAMP AND INK AND ALL YOU HAVE TO DO IS EMAIL 
ME YOUR BEFORE AND AFTER CARD
ALONG WITH YOUR CONTACT INFO**

So, come on ... Stamp, Snap a photo and Click Send...


There is one more class left... so that is 5 days left to send in your entries. 

Happy Stampin

Designer Series Paper: Beau Chateau (Retired)
Cardstock: Very Vanilla (#101650) and Crumb Cake (#120953)
Ink: Crumb Cake (#126975) 
Stamp: Petite Pairs (w:#122495 c: #122497)
Tools Used: Stampin Sanding System (#129367) and Sponge Dobber (#101610)


Thursday, July 5, 2012

Join The Thrill

Hi Friends! Im so thrilled to share with you today 
that when you sign up with Stampin Up! 
***For a Very Low $99***
You too can join in the fun!!!

If you love to scrapbook and/or create handmade cards
or looking to earn some extra cash for the  
bundle of Holidays coming up....


Thats Right ... Your Kit! Your Way! 

When you join My Kreative Team you'll enjoy receiving 
extra freebies from me and wonderful incentives to help
guide you be the best demonstrator possible. 

Click Here for some examples of how you can customize Your Kit!!

If your interested in Joining My Kreative Team... 

Wednesday, July 4, 2012

CAS Wednesday-Punch-O-Rama


Hello Fellow Stampers and Welcome to 
CAS Wednesday
you know I love them and am delighted to share
PUNCHES!!!! They are so much fun and 
help make the simplest cards even simpler (is that even a word!?!??)

I know today is 4th of July so I wanted to wish you all a 
Happy Independence Day! 
Todays feature isn't very Red White and Blue 
but I still hope you enjoy.


Cardstock color choice for today is Regal Rose (#105130)
Chocolate Chip (#102128) and Whisper White (#124302).


I haven't done too many baby cards so here I selected 
Baby Bundle (w: #118525 c:#120576) with my stamp pads
and my 1 1/4" Square Punch (#119865) 
and Scalloped Square Punch(#119884)
** I find these punches are so handy to have around all year long**


I took a piece of Pretty in Pink Cardstock (#100459) and cut to 4 5/8" x 2 5/8" and 
placed into the Perfect Polka Dot Embosslit Folder (#117335) 
and ran through my Big Shot Die Cut machine (#113439).

Then I cut a piece of Whisper White to 3" x 5" and attached the 
Pretty in Pink card together.
I selected the smaller stamps and colored each by hand with my 
Handy Dandy Stampin Write Markers and used my 1 1/4" square punch (#119865)  
to layer them with a Chocolate Chip and Regal Rose 
Scalloped Square Punch(#119884).

Before I attached all my pieces to the  8 1/2" x 5 1/2" piece of Regal Rose Cardstock 
(which I folded in half to create my card base)
 I wrapped a bow with my 5/8" Organza Ribbon (#114319)
and added the "Congratulations!" Sentiment by using 
the Large Oval Punch (#119855) and a Chocolate Chip Scallop Oval (#119856)

Done and the Labor for this card was under 5 Minutes! 
(giggle! giggle!)


Cardstock:    Pretty in Pink #100459Chocolate Chip #102128Whisper White #124302 and  Regal Rose #105130   
Ink: Chocolate Chip #126979, Regal Rose #126947 and Pretty in Pink #126955
Stamp: Baby Bundle (w: #118525 c:#120576)
Tools Used: 1 1/4" Square Punch (#119865), Scalloped Square Punch(#119884)Perfect Polka Dot Embosslit Folder (#117335) , Big Shot Die Cut machine (#113439),  Scallop Oval (#119856), Large Oval Punch (#119855) and 5/8" Organza Ribbon (#114319)


Tuesday, July 3, 2012

Let Freedom Ring - Techn{ink} Tuesday!

Hello Everyone! Today is Techn{ink} Tuesday and 
its All About... Let Freedom Ring!!

Im feeling Very Patriotic, how are you Celebrating 4th of July?
Its time for BBQ's, Family Fun and Relaxation!?! 
I know I cant wait to be Poolside..

Today I intermixed a Sponging Techn{ink} with a little Twist of Simply Scored....
I have been wanting to show more with this Fascinating Tool 
as an added warning ahead this will get a little messy

So Lets Roll....


 On the left hand side you will see a clean piece of Whisper White cardstock (#124302)
This is trimmed to 3 5/8" x 4 7/8" before beginning the next step 
I wanted to Stamp my image before I began to use 
my Simply Scored Tool (#122334). Here you see my image stamped in Midnight Muse (#126860)

On the right hand side you will see my images are stamped as desired and 
using my  Simply Scored Tool (#122334) 
 I scored a line right above my image.


Here you see (on left hand side) I turned my card right side up and began to score every 1/4"
You will want to turn your card UPSIDE down to get the desired score marks
in order to continue with this project. So now all your scored marks are
RAISED, right side up!


Next is where it gets a little messy. Using Crumb Cake (#121030), Marina Mist (#126962)
were going to begin our Antiquing Techn{ink}. First sponge with 
Crumb Cake  softly to get that slightly discolored affect (to lessen the white)
then sponge with  Marina Mist  to add the denim affect.
**These colors alone are Spectacular!!**


On the left side you see Im now sponging with Riding Hood Red (#126968) 
and on the left I needed a "walnut type stain" so I sponged with Soft Suede (#126978)
You can definitely see why having the scored lines raised were needed
to capture the colors accurately.


Lastly I attached the Antiqued Techn{ink} to my 3 3/4" x 5" piece of 
Midnight Muse Cardstock (#126843).
You can see the colors enhance and take nicely. 
And on the left is our final image.
You can see I added a few embellishments to adorn the 
Distressed Bakers Twine I selected.
If you don't recall how to color the twine to customize it 
for your project. CLICK HERE
After adding the ribbon and embellishments I glued this to 
a piece of 8 1/2" x 5 1/2" Riding Hood Red Cardstock (#111348)


And Heres The Added Bonus...


Did you know that the Simply Scored can be used to also create CUSTOM ENVELOPES!?! 
Seriously, its the perfect answer to all the left over cardstock you have
lying around! 
I added some extra Distressing and Stamped the interior lip of the envelope 
and now its customized to coordinate with my card! 


Simply Scored Wants YOU!!!

Cardstock: Whisper White Cardstock #100730, Red Riding Hood #111348, and Midnight Muse #126843.

Ink: Crumb Cake #126975, Midnight Muse #126860, and 
Red Riding Hood #126968, Marina Mist #126962 and Soft Suede #126978.

Tools Used:  Simply Scored Tool #122334, Antique Brads #117273 
Snail Adhesive #104332 and sponges #101610.


I hope everyone has a Wonderful and Safe Fourth of July
and 
May God Bless Our Troops!


Monday, July 2, 2012

Monday is... Full of Reasons To Smile


Need A Reason to Smile? ....


This Month Only, Get the Reason to Smile Set- a $20.95 value-for just $5 when you spend $50 on any Stampin’ Up! products (learn more). Or visit my online store to start your order!
Description$5 ItemPrice
Reason to Smile Wood-Mount Set131274*$5.00
Reason to Smile Clear-Mount Set131275*   $5.00

*Enter this $5 item number after reaching $50 on your order.